follow it's just me... on Pinterest.

Follow Me on Pinterest

Monday, October 31, 2011

.Unexpectedly Creative.

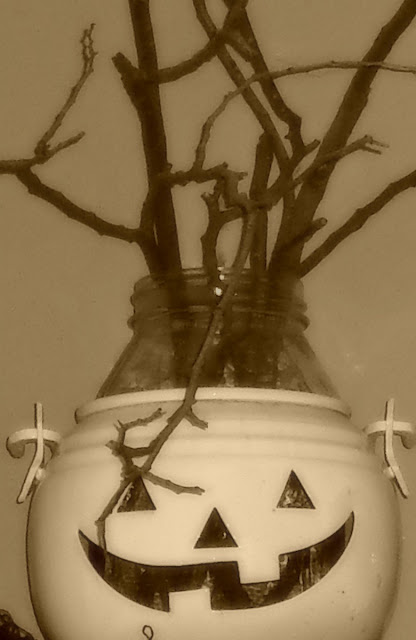
Happy Halloween to you~

I have excited kids at my house!  Oh, to be young again.
Now that I am old, I seem to be more practical. 
I have a couple main priorities... keep the kids warm, and get them home around bedtime.
Oh, and have a lot of fun too!
---------------------------------------------------------
I had to share these unexpectedly creative ideas with you.  I love to see things used in unconventional ways.  Often times, you have many of the items around your own home.  Get creative. 

This is just plain neat.  Red Hen Home created this focal wall and it is so clever.  It would be fun to change out the accents with the varying holidays. 
 
I saw old suitcases this past weekend at our local antique mall, and they were not very expensive.

~Pinterest~  Molding, hooks, and a bench cushion is all you would need for this beautiful headboard.


What is Pinterest?


Pinterest is a Virtual Pinboard
(description taken directly from Pinterest site).

Pinterest lets you organize and share all the beautiful things you find on the web. People use pinboards to plan their weddings, decorate their homes, and organize their favorite recipes.

Best of all, you can browse pinboards created by other people. Browsing pinboards is a fun way to discover new things and get inspiration from people who share your interests. To get started, request an invite. 

You will be amazed!  *Be sure to "follow" my pinboards.  I would love to follow yours.
~Pinterest~
.Lighted, old suitcase, medicine cabinet.  Too creative.


~Pinterest~
.Coffee Beans.

~it's just me...~
.Sand.

~Pinterest~
.I keep my cookie cutters in a big Ziploc.  This is a much better way to organize them.

 
~Pinterest~
.Floating shelves.
I am up to something again.  Yep, a good-sized project is in the works.  I am really excited to share it with you.  I will...very soon.   
 
I encourage any questions or comments to be left in the section just below this post. Comments, suggestions, and feedback are greatly appreciated, and so fun to get too! Thanks for taking the time.  ~Heather
Saturday, October 22, 2011

.The Designated Day.

D day {designated day} as I like to call it is the one day of the week I go through, and put away misplaced items around my house.  "Stuff" accumulates everywhere it seems.  Mostly, it collects in the kitchen on the counter tops and table. 

School papers, coupons, mismatched socks, toys, game pieces, receipts, etc. all find a new home throughout the week.  Days get busy and things get put aside.  Of course, it worsens as the week goes on.

An hour of "putting away" while kids are at school can do wonders.  Where do you hide store the things that are keepers?  Let's face it, everyone has things we need to hold onto, but do not want to display.
 
I keep a basket on top of my refrigerator for recipes, paperwork, spelling words, appointment cards, etc.  It is my "go to" spot.  I have to check it often, but can count on finding the items in there. 
~This may work well for a household with 4 kids~


~The Pleated Poppy~
 
~full of craft supplies, fabric, paper, small paints~
 
~perfect for keys, phone books, receipts, small tools, etc.~
 

~ The large, bottom basket stores all our bathroom extras~

~Pinterest~

 I encourage any questions or comments to be left in the section directly below this post. Comments, suggestions, and feedback are greatly appreciated, and so fun to get too! Thanks for taking the time.
~Heather~

Monday, October 17, 2011

.don't be scared.


.COME ON IN.

.DON'T BE SCARED.

Friday night our home was host to a ~Very Frightful, Birthday Bash.

Lots of family, and a few       unfortunate second graders where in attendance. 

Here is a glimpse into the "spooktacular" evening through the eyes of our "guests".
.W.E.L.C.O.M.E.


The party was tons of fun.  Great costumes, Creepy treats, and lots of laughs.

Have a great week!   

I encourage any questions or comments to be left in the comment section below this post. Comments, suggestions, and feedback are greatly appreciated, and so fun to get too! Thanks for taking the time.

Friday, October 7, 2011

.I promised some "how to's".

I am so happy and relieved to be done with our bathroom remodel.  Our house feels like a home again, not a mini construction zone.  Many nights I stubbed a toe walking down the dim hallway lined with tools.  Silly, 'cause there was an easy fix to that problem.  Hmm... Oh well, it is done, so glad.

Promising to give you a couple "how to's", I am sharing the process of our driftwood mirror, and also my very homemade shower curtain.  If you are an avid D.-I.-Y.-er you may not need to read my tutorial, just glance at the pictures.  I have included a couple other really neat ideas too!
.refurbished driftwood mirror.


Here are the before photos of our basic mirror.  We bought it last year at Gordman's for about $30-$40. 

After taping, I lightly sanded and primed the frame.  Then painted the frame with Pita Bread, the same color as the upper portion of our bathroom walls.  I didn't spend a lot of time on this.  I wasn't concerned with perfect coverage, as the driftwood would cover the majority.
More prep time was taken in preparing the driftwood.  I pressure washed the wood, and let it sit out in the sun for about 2 weeks.  We broke down the larger pieces into smaller ones.  My husband cut the backs off the pieces that were too thick.  This gave us a flat surface to glue onto the frame.  We have a light fixture above the mirror we had to consider, as it had to fit underneath.  Hot-glue was my adhesive of choice.  It was convenient to have it set, or bond immediately.  Placing the pieces on the frame was harder than it looked.  I compared it to putting together a jigsaw puzzle.  It is a non-precise thing to do, and difficult for a perfectionist.
After all the pieces were in place, I covered the glass, and sprayed the mirror with Polyurethane to seal the wood.  The Poly really brought out the many different colors. 

The mirror was my biggest decorating risk in our new bathroom.  I am in love with it!

I have to show you this mirror from Better Homes and Gardens.  It is stunning!  There are so many possibilities. 

.love the seashells.  .love the Chocolate brown wall.
.....................................................................................................................................................................
.I purchased the white fabric {actually, a bedspread} from a garage sale for $1.
Adding the Khaki fabric on top gave it the length I needed.
 
  • Pre-wash your fabric prior to stenciling.
  • Mix Martha Stewart Fabric Medium with your choice of paint     according to directions.
  • Tape or use spray adhesive to secure the stencil.
  • Wait 24 hours after stencil is complete, then iron opposite side to set.  "Setting" your painted stencil will allow your fabric to be washed without fading.
  • The stencil will not feel hard and crunchy, but soft as the fabric.
There are several different stencils that come in this package.  The painted runner below is the same stencil as I chose for my shower curtain.  The pillows were also painted using stencils included in this set.  This package of stencils retails for around $16.  I did use a 50% off coupon to purchase mine.
I encourage any questions to be left in the comment section below this post. Comments, suggestions, and feedback are greatly appreciated, and so fun to get too! Thanks for taking the time.  


Monday, October 3, 2011

.bathroom reveal.

Hello... It has been a few days.

We have been extra busy at our house trying to finish this bathroom remodel.  We are there.  It is done.
Our rustic, cottage bathroom is complete.

This post will be full of pictures.  Some may be similar, but taken from a different perspective.  Pictures tell the story better than I ever could.


.our driftwood (straight from the Red River) mirror.
 
.hallway view.
.Thank you, Katie for my sweet painting.
brambleberrygrace.blogspot.com

."before" hallway view.
I had an initial plan of using a seaside cottage as inspiration for our bathroom.  My perspective changed a bit through this process.  This space has become a collaboration of seaside (color), rustic, cottage.  The rustic simplicity of this room gives off a feeling of comfort.  It is not fancy, just comfortable

The design board below represents our initial design elements we had chosen for our bath.  All were used, with an exception being the sink base.  We chose to paint the base and distress it, rather than stain it dark.

.yes, that is sand in the jar holding toothbrushes.


As with any project, ideas can change as progress is made.  An initial idea is great for direction, but "work or play" in the space to get the true feel.  It took me a year to figure out what I wanted and needed to do in this room.  Yet still, I made changes to the original plan.


Lots to take in, I know... 
I will give a tutorial in my next posting on how I made my shower curtain, products used, etc., and the before/after pictures of our driftwood mirror.  I have lots to share with you.   

.storage in addition to our linen closet.

~Thanks again for all your comments and wonderful ideas. I enjoy reading each, and every one of them. I encourage any questions or comments to be left in the section directly below this post. Comments, suggestions, and feedback are greatly appreciated, and so fun to get too! Thanks for taking the time.  Heather